Water Etching: Decorating Bone-Dry Pottery
Written by Yuwen Wu

Have you ever finished throwing a piece and planned to decorate it later—only to get busy or forget? When you finally return to the studio, the pot is already bone dry. At that stage, the surface is often too hard to carve, trim, or add decorative details.
It can feel frustrating, especially when you still want to bring more life and character to the piece.
Today, I’d like to share a technique called Water Etching, which allows you to enhance and decorate your work even after your pots have reached the bone-dry stage.
Several resist materials can be used effectively. Three of the most accessible options are Shellac, Mod Podge, and Wax Resist.
For this demonstration, I used Shellac and Mod Podge. In my experience, wax resist can be easily wiped away during the process and often needs to be reapplied after several passes with a sponge. For this reason, I chose not to use wax this time.
In my opinion, Shellac forms a hard protective layer that holds the design firmly and resists being wiped away. However, it is sticky and can be messy to work with. You will need to clean your brush with alcohol after applying it, so don’t use one of your favorite brushes for this project.
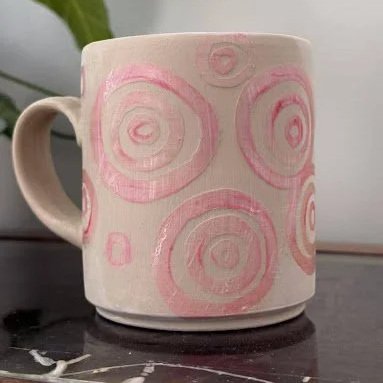
Mod Podge also works well once fully dry. It has less odor and is water-soluble, making cleanup much easier. However, because it dries clear, the edges of your design can be difficult to see while working. To solve this, I added a small amount of food coloring so I could clearly distinguish the design areas.
Let’s Get Started
Materials
A leather-hard or bone-dry pottery piece
A brush
A water-resistant medium (Shellac or Mod Podge)
A sponge
A bucket of clean water

Process
1. Apply the Resist Medium
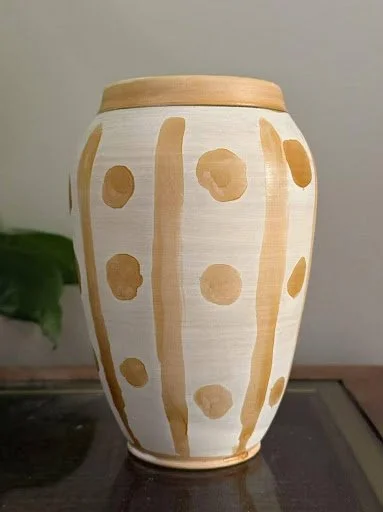
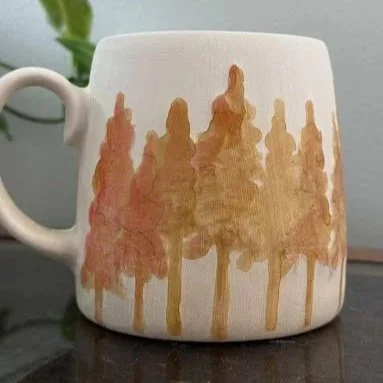
For the two vases, I dipped a brush into Shellac and drew freeform lines and dots on the surface, then allowed them to dry completely. Once dry, the Shellac formed a hard protective crust on the surface.
2. Wipe Away the Surface
Next, dip a sponge into a bucket of clean water and squeeze out the excess. Gently rub the surface of the piece, cleaning your sponge frequently after several passes.
As you work, the exposed clay areas will be soften and begin to wash away, while the protected areas remain intact.
Work slowly and gently—you do not need much pressure. The goal is to remove a thin layer of clay from the unprotected areas so that your design becomes raised and visible.
If you use too much water or apply too much pressure, you may weaken the structure of the piece. Patience is key.
The Result
Voilà!
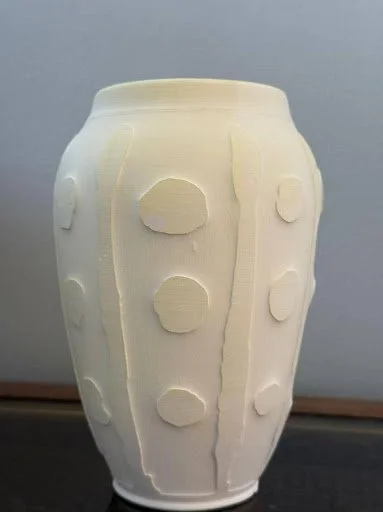
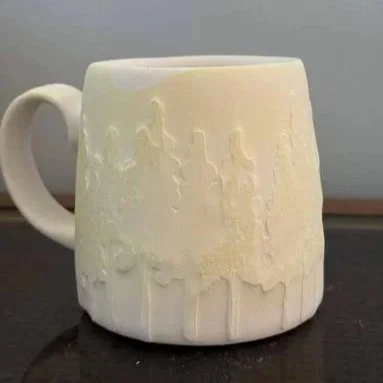
This technique creates a subtle, tactile design that you can both see and feel. It’s a simple yet powerful way to add texture and visual interest—especially when the clay is already bone dry and traditional carving is no longer possible.
Why This Technique Is Helpful
Water etching gives you a second chance to decorate your work. Even if the timing didn’t go as planned, you can still add meaningful surface design. With just some water and a simple resist medium, a new layer of expression can emerge.
You can explore even more possibilities with this technique:
Apply underglaze beneath the design to add depth. Create multiple layers of water etching to build visual richness and dimension. Combine it with other surface techniques to achieve unique textures.
Start experimenting with this technique and let your creativity go wild. I encourage you to try it and create something truly interesting and personal.